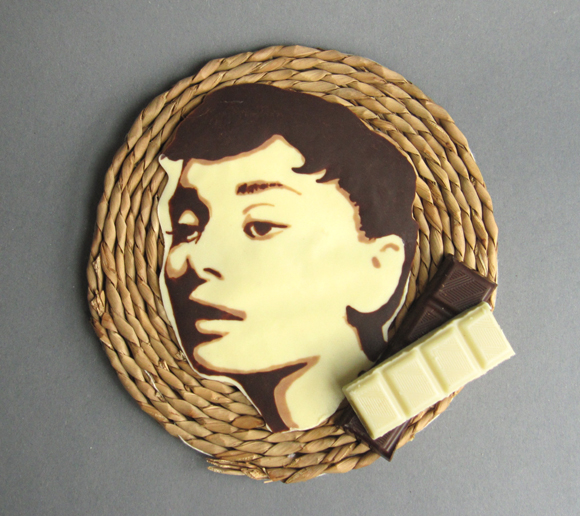
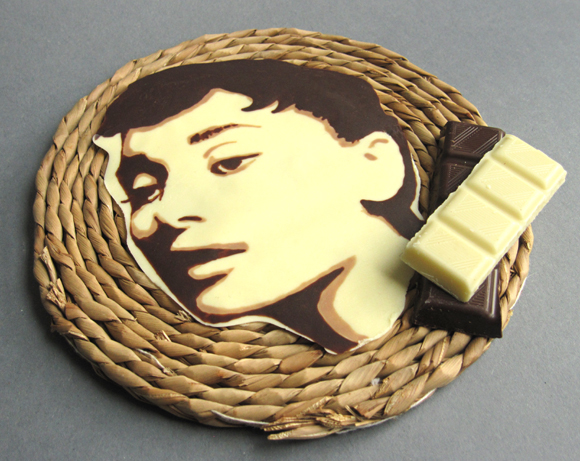
Today’s post will introduce you to a simple chocolate painting technique that yields amazing results. Don’t worry, it doesn’t require special equipment or outstanding drawing skills. You can choose any motif you want, be it pictures of friends and family, handwriting, your kid’s favourite cartoon character, an elegant pattern, a company logo or the movie star you have a crush on – almost anything can be turned into an accurate chocolate picture with this easy method. You can use it as a neat cake decoration, or serve it on a plate together with dessert.
I was thrilled when I discovered this technique on Yurin’s Obentou Blog (*3兄妹ママのお弁当ブログ*). It’s a Japanese blog that centers around kyaraben. Go have a look at it! It doesn’t matter if you can’t understand Japanese, because looking at the pictures is satisfying enough.
Basically, I will be explaining Yurin’s method here, but since I’m not using the the same material and I’ve chosen a different kind of motif I adjusted the method plus I added some personal tips.
How to make a Chocolate Painting
You will need:
- a picture subject.
- dark and white chocolate. I used regular block chocolate, the dark one had 72% cocoa content. Note that Yurin is using so called sign choco. Apparently, that’s chocolate sold in Japan for decoration purposes. It has quick drying properties, comes in a pen-shaped tube and there are different colours available. But really, regular chocolate works fine too.
- optional: food colouring. I tried regular liquid food colouring once and it resulted in a rather bad chocolate texture. I guess it’s better if you work with liposoluble food colouring or powder alternatives. I mixed white chocolate with matcha green tea powder once and it turned out well. Please tell me if you know of any other methods to colour white chocolate naturally.
- a piece or cardboard or a tray
- parchment paper
- small plastic bags
- a bamboo skewer or a toothpick
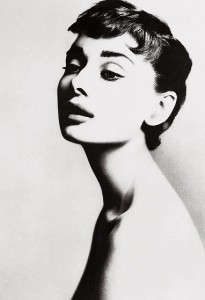
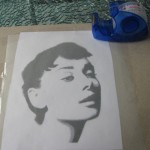
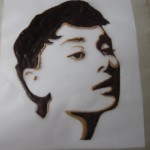
- First, think about which motif you would like to use. It’s easiest to use stylized images. Here are a few suggestions for suitable art styles: cartoon/comic, line art, stencil art, print art, art nouveau, pop art, pictograms, silhouettes and so on. You can look for stylized images through a search engine by using the named keywords, or you could trace a picture from a book or magazine directly on the parchment paper. Or even draw your original artwork on the parchment paper. Or stylize a photograph by yourself with photoshop, like I did. I took an Audrey Hepburn picture (original source) and turned it into a 3-layer stencil art following this easy youtube tutorial.
As you can see, I mirrored the image. This step wasn’t really necessary in my case, but it is especially important if you have writing on your picture. I also did some corrections with the pencil tool, like eliminating the highlight in the hair.
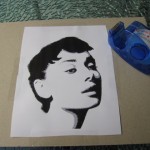
- If you use a picture printout, tape it to the cardboard. Then cover with a piece of parchment paper and tape that onto the cardboard as well. If you drew directly on the parchment paper, make sure the surface with your pencil marks is facing the cardboard.
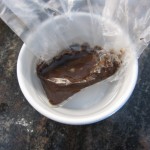
- It’s best to start painting with the darkest shade, especially when you have an image with outlines. Chop the dark chocolate finely and fill it into the corner of a small plastic bag. Fill a bowl with hot tap water, dip in the plastic bag corner and melt the chocolate, kneading it from time to time to make sure there aren’t any clumps. The temperature of the water shouldn’t exceed 50°C.
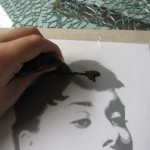
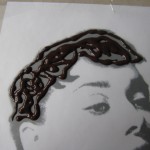
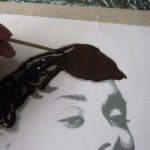
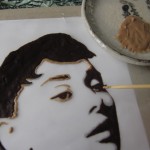
- When the chocolate is melted, cut away the tip of the bag corner and you can start drawing the dark layer. On large surfaces, you can apply the chocolate directly from the bag. For fine details, use the bamboo skewer. You can also pipe a bit of chocolate on a plate, dip the skewer in it and draw. The bag keeps the chocolate from cooling too quickly so only pipe out a little a time. When your done, let the painting cool down in the refrigerator.
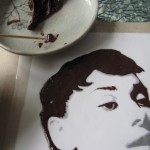
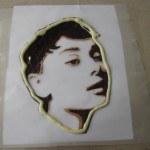
- Now it’s time to apply the midtones. I mixed Moneygram fees dark and white chocolate together to get the colour I wanted. When drawing, it’s okay to overlap the dark chocolate areas since it won’t shine through later. Refrigerate again when you’re done.
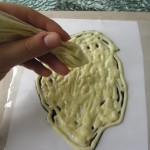
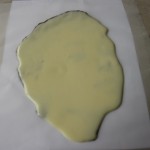
- At last, apply the white chocolate background. This is the easiest drawing step because you can just splash and disperse it. Make this layer thick enough to give the chocolate stability. Be careful not to use overheated chocolate or your previous work will melt away! Shake the picture a bit so prevent air bubbles. Refrigerate for one last time.
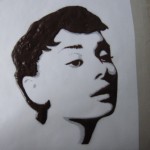
- Carefully turn the chocolate over when it’s firm. Don’t touch it with your bare hands – use gloves or a napkin. You’re done!
A few last words: The chocolate has a rather soft texture when at room temperature and melts as soon as you touch it. That can be a desirable state if you’re using the chocolate picture as a cake frosting for example. If you’re aiming for a chocolate picture with a very shiny surface that snaps, you have to put in some extra effort when heating the chocolate. Research chocolate tempering if you’re interested.
Have fun with this cool technique! And please let me know if you have additional tips! :-D

 Get updates via twitter

This is soooo cool. Thanks for sharing this. I would love to try this sometime.
You’re welcome. Let me know if you post any pictures!
That’s great! The results are very good!
Awesomme! I’m definitely trying this out as soon as my midterms are over. This will be perfect for a project I’ve been pondering over. Btw, I love the fact that you used Audrey Hepburn as your example subject; I adore her!
Hmm, for colored painting, you could try candy melts, since they’re already colored.
Great, I’m looking forward to see your artwork! Audrey Hepbrun is awesome but I don’t think she’s very recognizable in the chocolate picture – I still need some practice, haha. Thanks for the candy melts tip, I’ll go and have a look if I can find anything similar in my region.
Are you kidding? Of course she is recognizable. I clicked on the link because of her!
Wow!!!! This is awesome!!! I must do this very soon. Thanks for the great step-by-step photos. I love Audrey Hepburn!
wow! this is really genius.
Wow, this is spectacular! I had tried something similar here: http://lacerise.blogspot.com/2008/10/chocolate-princess-on-birthday-cake.html but it never occurred to me you could work off a photograph. You have a lot of patience and skill!
I love your princess! I like how you variated the thickness of lines, it looks very nice. The reaction photos of your daughters are awesome :-D
It may have took some time to complete my chocolate painting, but it certainly didn’t require skill! I just traced the lines :-)
Hi, found your post on Tastespotting, and I have to say it is amazing =)! Thanks for sharing the method with us, and your tips!
i recognized audrey right away! this is a fun and tasty project, thanks!
Here’s my Twiggy! http://www.flickr.com/photos/48028325@N07/4403622594/
That’s so cool! Mind if I put this picture in my post?
Thank you for your response to my comment. What I love the most about this type of decoration is that it is TASTY. Just pure chocolate, no need to compromise flavor in favor of looks. (By the way, your tutorial is also a masterpiece of its kind!)
That’s just stunning… so awesome!
What a fantastic job – great tutorial. Thank you so much for posting this!
:)
ButterYum
I love this! A chocolate Audrey! Soooo great!
This is awesome!
I’m in the pastry program at the culinary institute in pittsburgh and if I remember correctly, my chef said that powdered colors or gel work with chocolate. I’m not entirely sure, but I can ask in class tomorrow.
Thank you paigeannt, I’d love to hear some expert advice. I recently tried natural powder colours, I’ll probably post about my findings tomorrow.
UNIQUE MADE WITH CANDY. KATHERN HEPBURN WHEN VERY YOUNG?
Jojo, if you want to color chocolate, you need fat-based/special colors, pati-versand has some, here:http://www.pati-versand.de/Zutaten/Lebensmittelfarbe:::5_34.html
But I think to work in black/white is very nice.
Kater war übrigens schwer beeindruckt von “Mafioso-Schokomilch”
Schokolade mit Kakaobutter verdünnen macht sie flüssiger, sie glänzt mehr, trocknet schneller, ich denke das ist das Geheimnis der “sign-chocolate” von Yurin.
Welche Schokolade benutzt Du, einfach aus dem Supermarkt, Lindt?
Diese “billige” Kuvertüre aus der Backabteilung ist ganz schlecht, wird klumpig.
Danke für den Tipp zu den Farben Amato :-) Den Trick mit der Kakaobutter muss ich mal ausprobieren. Ich benutze meistens Lindt Schokolade. Auch mit der gleichen Schokolade kann das Ergebnis sehr verschieden sein, vieles hängt auch vom Temperieren ab.
Thank you very much for these great tutorials!
The chocolate picture looks very great. I did never seen such before.
Wonderful!
I manipulate photos like this to do carved pumpkins and a two toned version to do portrait stamps for presents. My man may be getting one of these for his birthday. But his birthday is on Easter, so we’ll see if it actually happens.
Really, really love this.
Oh yah, it worked so well! We ended up using 4 shades of brown and used pastry bags with piping tips. Also had some trouble distinguishing shades of gray, so used a light table. My 17 and 15 year old daughters did it.
The results were fantastic! Thank you, thank you, thank you for this tutorial! (And I hope you got at least a bit of traffic because I linked to you.)
People, go check out the link to see the result!
Incredible. Thanks for sharing your talent with the rest of us :)
I tried my hand at it last night and posted it on my blog this morning. I need to use a better quality chocolate next time but the technique was easy because of your tutorial.
A most excellent article. You make it look so simple that I want to try.
A friend sent me a link to your blog post…And I ended up using this technique in my final project for my Chocolatier class! It worked very well! Hopefully you are able to view the picture…
http://www.facebook.com/photo.php?pid=31030149&l=34c85670d6&id=1057565828
Holy sh…, that looks stunning!
I use candy colors sold in the candy making isle of my local craft store to color white chocolate. I think they are oil based and won’t separate.
Hi, when you go to a site with a foreign language, just right click and go to Google translate. It works beautifully.
Also, your work is beautiful.
We have those chocolate pens like Yurin uses in the US too. Just google “candy writers.” They are made by a brand called CK. I want to order them soon so I can use them for my bento boxes =D
They look pretty useful!
Jojo! I used your technique to make a Dharma initiative cheesecake for the lost finale :D I linked you on the bottom of the entry, which you can see here: http://pigsinblankets.net/archives/472
Awesome result! And thanks for linking.
Thanks so much! I’ve been excited to try this ever since I found this article…and today’s finally the day!
Jojo, yesterday I did a drawing with chocolate … anything easy, Mickey Mouse, but was very nice and my daughter (3 years), loved it …. post it on September 10 … thank you very much for your instructions!
I love this and had a total blast trying it myself. My husband loves it so much he never wants to eat it! :-)
Here’s my post: http://dirtundermynails.com/2010/09/19/fall-bonfire-and-chocolate-awesomeness/
genius!
Ok, now i’m really hungry. This is too cool. I was looking for something else and ran across this. Great job on the step by step.
This is amazing. I can’t wait to try this out. Thanks for sharing.
WOW! I am going to try this real soon. Great directions how to do this. Thanks for sharing!
Do you mind if I post this, in a translated version to spanish in a forum? I’ll put a link to your website. Actually, probably by the time you read this I would have posted this in the forum already. So let me know if you mind, I will delete it if you do.
Thanks for asking, I don’t mind you posting it.
Nicely done! Did you come up with this yourself?
hey i loved ur post… pls hav a look at my blog…. i made it n sold one too! :)
I can’t thank you enough for the very detailed painted chocolate tutorial! I am very eager to try it for a cake I’m making this weekend. Thank you for sharing your expertise!!
how do you think these would hold up as cupcake decor??
nice idea!
I know this post is from a while ago, but I just found it for the first time. Really lovely chocolate work, and great tutorial! Thanks so much. :)
I just saw your chocolate Audrey which is great. Have you tried to do something similar on acetate to get a shiny effect to your chocolate?
Thank you Irene. Acetate? You mean something like vinegar? Wouldn’t it affect the taste?
oh wow!!! what a brilliant idea! i can’t wait to try this!
This is so cool! Beetroot is a natural colorant for white chocolate too.. for a pinky purple colour.
Beautiful! I did this technique with buttercream, but not chocolate. Will try it, thanks for the great post!
Very useful and easy technique…thanks a lot for sharing!!!
Oh! thank you so mucho! you’re genius. Greetings from Colombia :)
I would love to eat this painting. Awsome blog about the chocolate painting. Have seen choclates, chocolate cakes and chocolate recipies but never seen such an art with chocolate its really wonderfull.