Archive for the ‘Black & White’ Category
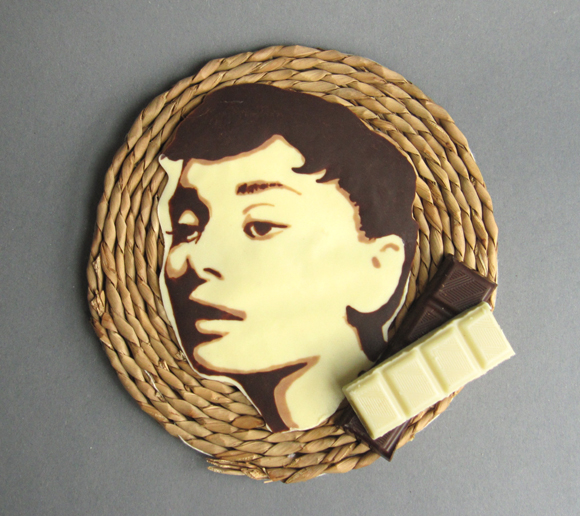
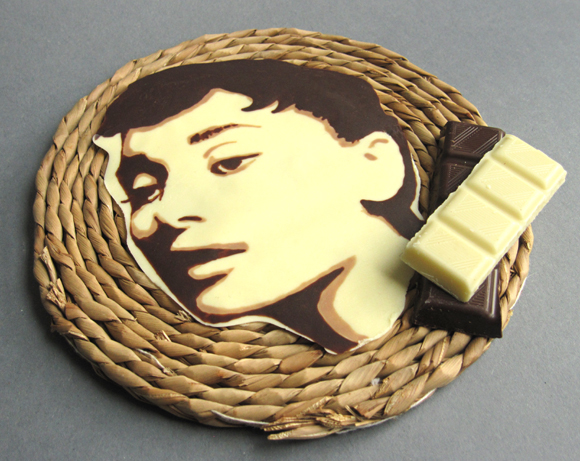
Today’s post will introduce you to a simple chocolate painting technique that yields amazing results. Don’t worry, it doesn’t require special equipment or outstanding drawing skills. You can choose any motif you want, be it pictures of friends and family, handwriting, your kid’s favourite cartoon character, an elegant pattern, a company logo or the movie star you have a crush on – almost anything can be turned into an accurate chocolate picture with this easy method. You can use it as a neat cake decoration, or serve it on a plate together with dessert.
I was thrilled when I discovered this technique on Yurin’s Obentou Blog (*3兄妹ママのお弁当ブログ*). It’s a Japanese blog that centers around kyaraben. Go have a look at it! It doesn’t matter if you can’t understand Japanese, because looking at the pictures is satisfying enough.
Basically, I will be explaining Yurin’s method here, but since I’m not using the the same material and I’ve chosen a different kind of motif I adjusted the method plus I added some personal tips.
How to make a Chocolate Painting
You will need:
- a picture subject.
- dark and white chocolate. I used regular block chocolate, the dark one had 72% cocoa content. Note that Yurin is using so called sign choco. Apparently, that’s chocolate sold in Japan for decoration purposes. It has quick drying properties, comes in a pen-shaped tube and there are different colours available. But really, regular chocolate works fine too.
- optional: food colouring. I tried regular liquid food colouring once and it resulted in a rather bad chocolate texture. I guess it’s better if you work with liposoluble food colouring or powder alternatives. I mixed white chocolate with matcha green tea powder once and it turned out well. Please tell me if you know of any other methods to colour white chocolate naturally.
- a piece or cardboard or a tray
- parchment paper
- small plastic bags
- a bamboo skewer or a toothpick
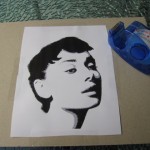
- First, think about which motif you would like to use. It’s easiest to use stylized images. Here are a few suggestions for suitable art styles: cartoon/comic, line art, stencil art, print art, art nouveau, pop art, pictograms, silhouettes and so on. You can look for stylized images through a search engine by using the named keywords, or you could trace a picture from a book or magazine directly on the parchment paper. Or even draw your original artwork on the parchment paper. Or stylize a photograph by yourself with photoshop, like I did. I took an Audrey Hepburn picture (original source) and turned it into a 3-layer stencil art following this easy youtube tutorial.
As you can see, I mirrored the image. This step wasn’t really necessary in my case, but it is especially important if you have writing on your picture. I also did some corrections with the pencil tool, like eliminating the highlight in the hair.
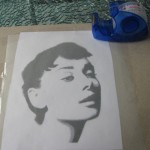
- If you use a picture printout, tape it to the cardboard. Then cover with a piece of parchment paper and tape that onto the cardboard as well. If you drew directly on the parchment paper, make sure the surface with your pencil marks is facing the cardboard.
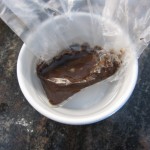
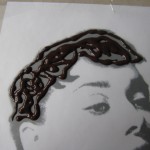
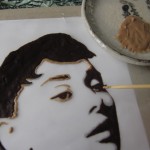
- It’s best to start painting with the darkest shade, especially when you have an image with outlines. Chop the dark chocolate finely and fill it into the corner of a small plastic bag. Fill a bowl with hot tap water, dip in the plastic bag corner and melt the chocolate, kneading it from time to time to make sure there aren’t any clumps. The temperature of the water shouldn’t exceed 50°C.
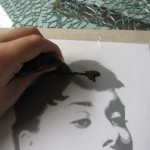
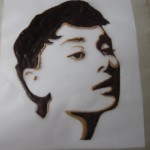
- When the chocolate is melted, cut away the tip of the bag corner and you can start drawing the dark layer. On large surfaces, you can apply the chocolate directly from the bag. For fine details, use the bamboo skewer. You can also pipe a bit of chocolate on a plate, dip the skewer in it and draw. The bag keeps the chocolate from cooling too quickly so only pipe out a little a time. When your done, let the painting cool down in the refrigerator.
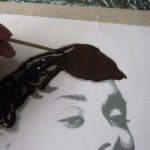
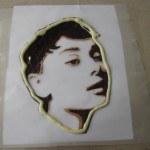
- Now it’s time to apply the midtones. I mixed Moneygram fees dark and white chocolate together to get the colour I wanted. When drawing, it’s okay to overlap the dark chocolate areas since it won’t shine through later. Refrigerate again when you’re done.
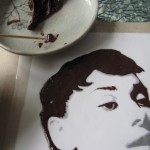
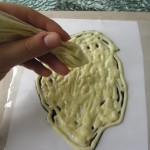
- At last, apply the white chocolate background. This is the easiest drawing step because you can just splash and disperse it. Make this layer thick enough to give the chocolate stability. Be careful not to use overheated chocolate or your previous work will melt away! Shake the picture a bit so prevent air bubbles. Refrigerate for one last time.
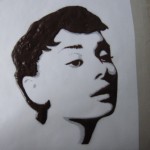
- Carefully turn the chocolate over when it’s firm. Don’t touch it with your bare hands – use gloves or a napkin. You’re done!
A few last words: The chocolate has a rather soft texture when at room temperature and melts as soon as you touch it. That can be a desirable state if you’re using the chocolate picture as a cake frosting for example. If you’re aiming for a chocolate picture with a very shiny surface that snaps, you have to put in some extra effort when heating the chocolate. Research chocolate tempering if you’re interested.
Have fun with this cool technique! And please let me know if you have additional tips! :-D
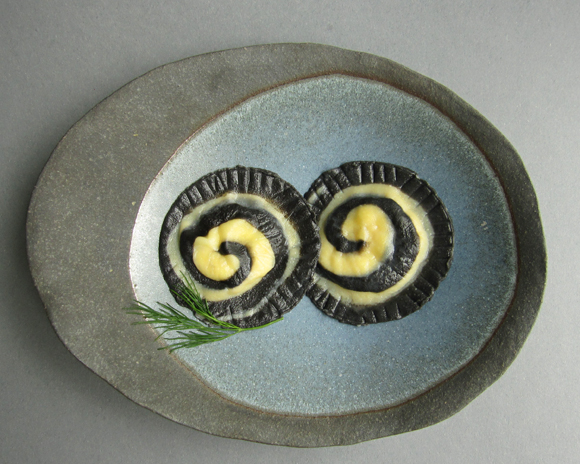
Homemade squid ink spiral ravioli with fish filling! The swirl pattern is an eye-catcher. This could be a neat main dish for a black and white party menu. Don’t worry, you can make the pasta without any machine.
You’ve surely seen spiral cookies before – they are easy to make and look nice. If you can make a spiral pattern with cookie dough, why not try it with pasta dough I thought. It’s just as easy as making the cookie version. The main difference is that the slices should be thinner and you have to make sure that the different dough parts stick well together before cooking.
With the method I show here, you could apply all sorts of cross-section patterns to pasta. An open field for your creativity! Next on my to-do list are checkered pasta and panda pasta :-D
I chose white fish filling for the ravioli because it has a neutral colour that isn’t noticeable through the pasta dough and the flavour goes well with squid ink (recipes is at the bottom).
Homemade Spiral Ravioli Recipe (makes 10-12 pieces)
Cooking Soundtrack: Jan Garbarek with Keitgh Jarrett – Spiral Dance
Spiral Squid Ink Pasta
- 60g (ca. 4 Tbs) all-purpose flour
- 60g (ca. 4 Tbs) semolina (durum wheat flour). For those who live in the German area: Kauft einfach Spätzli- bzw. Spätzlemehl, das besteht ganz oder zum Teil aus Hartweizendunst.

- 1 egg, beaten
- 2 tsp olive oil
- 4 tsp water
- 1/2 – 1 tsp squid ink
- Mix half the amount of all the ingredients except the squid ink together in bowl with a spatula. Remove from bowl and knead until you get a smooth and soft dough.
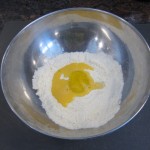
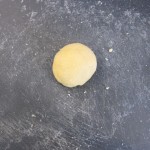
- Do the same with the other half of the ingredients including the squid ink. Wrap the doughs separately in plastic foil and let them rest for an hour at room temperature.


- Place the the doughs one after another between 2 sheets of plastic foil and roll out evenly to a thickness of 5mm. Why plastic wrap and not a floured surface you might ask. Well, we want to preserve the moisture. Stickiness is good in this case!

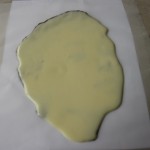
- Brush the surface of one of the doughs generously with water. Place the other dough on top and roll out again until you reach a thickness of 5mm. Wrap and refrigerate for about 30 minutes.

 Trim away part of the edges where the doughs don’t overlay.
- Flatten the 2 short edges.

- Brush water on one of the edges and carefully roll it. Use pressure and avoid trapping air inside.


- Brush a small part of the surface that lies ahead with water and roll by pulling the plastic foil. Use the blunt side of a knife to make the roll firm (like shown in the picture). Repeat this steps until you reach the end. Smear the edges with your fingers.


- Wrap it in plastic foil (looks like a salami!) and put it in the freezer for 30 minutes.

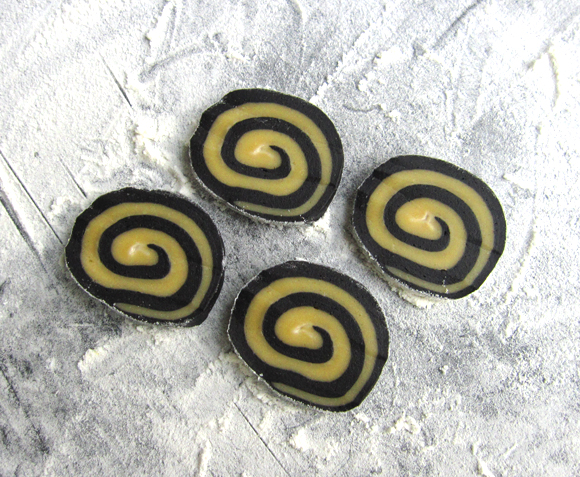
- Now the most thrilling step: Slice the dough and do a victory dance if the spirals turned out well.

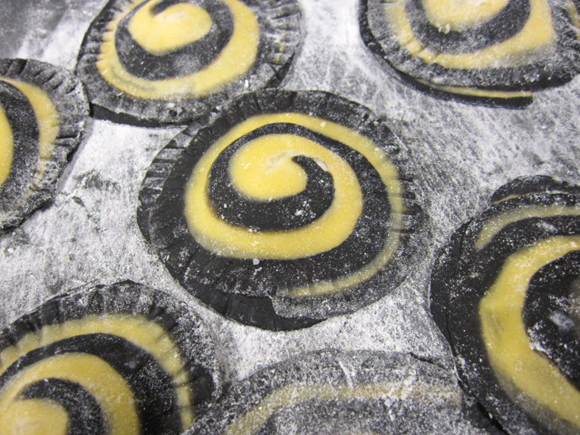
- Roll the slices out thinly on a floured surface.

- Put 1 tsp of ravioli filling in the middle of a slice. Damp the brim, place another slice on top and press on the brim with a fork.


- Simmer in salted water for 5 minutes.

- Serve with butter and dill. Yeah.
Pikeperch Fish Filling for Ravioli from Pauli – Rezeptbuch der Küche
- 120g pikeperch filet, cut into small cubes
- 100g cream, 35%
- 12g pasteurised egg white (I left that one out)
- fresh dill
- salt, pepper
- Blend fish, salt, egg white and half of the cream together in a mixer.
- Transfer the mixture to a chromium steel bowl and stack on top of another bowl filled with ice water. Stir.
- Sieve the mixture and cool again.
- Lightly whip the rest of the cream and add it together with dill, salt and pepper to the mixture.



 Get updates via twitter
